Experiment with the Rule of Thirds
It’s one of the most basic rules of photography composition--the Rule of Thirds--and its merits can be seen in countless professional photographs and paintings. To understand the Rule of Thirds, visualize two vertical lines and two horizontal lines dividing your image into nine equal squares. You then place your key subjects and points of interest along these lines. They will ‘rest’ where the lines intersect--in the crosshairs.
To better understand this concept, take a few of your photos and imagine the nine squares atop the image. Where are your primary items of interest? Choose a few of your favorite photos, the ones that really speak to you, and try the same thing. You may be surprised at how often the Rule of Thirds is at play in your favorite images.
Most camera manufacturers offer a virtual screen overlay that can divide your viewfinder into the Rule of Thirds format and this may help you get used to seeing your images in this way. You may prefer not to use this guide, but if it is available on your camera and you are new to the concept, try it and see just how different your images appear after experimenting. Think about where you want the eye to be drawn and use this guide to help you create that dramatic event.
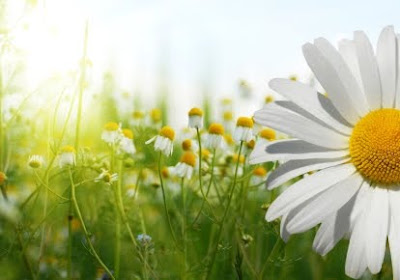
Summer Stretches of Light:
One of the many beauties of summer includes the promise of longer days, and these time changes in sunrise and sunset can impact your photography. If shooting sunrises tops your list, be prepared to get up earlier! Also, certain areas with extremely hot weather will mean an increased intensity of sunlight fairly early in the morning.
If possible, skip the midday sun as it can often be harsh and may wash out vivid colors. Because the evenings arrive later in the summer, you have more time to prepare your dusk shots. Feel free to start shooting a bit earlier than usual and see how the changing shadows and colors affect your photography.
Experimenting with sunrise and sunset shooting can be one of the most satisfying and interesting aspects of vacation photography. Taking into account the local landscape, unique architecture and weather patterns can combine into creating a series of images that move friends and family and possibly even inspire them to visit the locale themselves!
Take a Tripod AlongProfessional photographers understand the value of a quality tripod, and this accessory help improve your photography by stabilizing your camera and minimizing the camera shake so commonly found in contributing to those blurry photographs. A tripod is particularly helpful if you have to shoot at low shutter speeds.
Here are a few to consider:
http://www.richmondcamera.com/Vanguard-Tripods-and-Heads-s/85.htm
How-To Read a Digital Histogram
Your digital camera has a simple but powerful tool that can help you evaluate the exposure of your images. It’s called a histogram, and it’s essentially a representation of the contrast and dynamic range in each image. A histogram shows the content of each exposure typically using a range from 0 (true black) to 255 (true white). You’ll find the ‘true white’ illustrated at the far right of the graph and the ‘true black’ on the far left. A well-exposed image will show points close to both ends. If a histogram is abruptly cropped on one end, this usually indicates that your image is under or over-exposed.
Each histogram image tells a story about the exposure of the image and can help guide you in making adjustments so that future images are properly exposed. 
Weekend Warrior: Take a Quick Photo Road Trip
Have you ever thought about taking a Saturday (or Sunday) off from chores, errands and other weekend commitments to spend a day following your photographic passion? With spring knocking on the door, it’s time to seize the opportunity to get out and explore your locales. It doesn’t have to be elaborate or a far-flung destination; even the neighboring town can be a grand adventure.
Here’s a quick guide to help you plan your weekend getaway.
The Photo Day Tripper’s Checklist:
- Write down the names of a few towns that are only 30 minutes to a couple hours away from where you live. Decide which one holds the most interest.
- After choosing a town, do an online search for interesting facts about the town-- a city park, an iconic building, an upcoming festival or unique wildlife.
- Choose a date for the safari--it can even be this weekend! Just make sure to clear your calendar--and don’t accept new appointments. You can, however, invite another shutterbug to travel with you!
- Prepare all your gear including charging your camera batteries, format memory cards (and pack extras), include a lens cleaning kit (here are a few items to consider: http://www.richmondcamera.com/Camera-Care-s/7.htm) and tripod in your camera bag. Also bring your external flash and extra lenses if you have them. And don’t forget your charging cable (or dock) and your camera’s manual!
- Pack extra water bottles and snacks in your car in case you end up staying in one location longer than you expected. You don’t want low-blood sugar to distract you or pull you away from your location too soon.
We often talk about wanting to spend time experimenting with our craft but we also realize that everyday life can get in the way of even the best intentions. An impromptu photo getaway can give you the mental space and some uninterrupted time to explore a new location and experiment with your unique viewpoint.
Pick a place, pick a date, grab your gear and hit the road!
 Sport Shooting Technique: Zone Focusing
The concept of zone focusing is commonly used in street photography whereby the photographer sets his DOF (depth of field) for a specific area and waits for the subject to enter the frame. This technique is also used in sports photography and can help you position yourself to capture the action when it hits.
You will need to shoot in manual or AP (aperture priority) mode. Estimate the number of feet from the camera that you expect the subject to be and then use the smallest aperture available for that distance. You may need to experiment to find the correct setting, but keep in mind that this technique is designed to position the photographer to be ready to capture the action when it happens; the images may not be tack-sharp but will be reasonably sharp because the goal here is to be ready for the event when it happens.
Telling Your Story: How to Create a Powerful Photo Essay
Photography has long been considered a powerful storytelling medium, and the photo essay is simply a more deliberate method of telling a particular story or chronicling a certain event. Photojournalists such as Lauren Greenfield and Deanne Fitzmaurice have captured our imaginations and touched us through powerful photo narrative, and with today’s digital technology and a few storytelling techniques, you can begin experimenting with your own photo essays.
Here are a few tips to help you get started:
- Clearly Define Your Story: It can be as simple as the first day or school or something more complex such as a controversial topic or current event. Whatever the case may be, make sure you can clearly define it and explain it in one or two sentences. The clarity gleaned from this exercise will help guide you throughout the process.
- Go a Little Deeper: Consider what aspects of the story you wish to convey. Is it the wonder of seeing a natural wonder for the first time? The excitement of playing in a first little league game? Spend a little time contemplating the topic as you may uncover other aspects of the event to explore.
- Plan Your Images in Advance: It doesn’t have to be exact, but think about each photograph as a paragraph or chapter of your story. How many images you take is up to you as each story is unique. You may find that ten images portray the event as you wish while others may take fifteen or twenty. There is no right or wrong number; just make sure that each photo serves a particular purpose and plays a role in moving the story forward.
- Consider How to Share Your Story: Continue to play with your creativity by enlarging the photos and having them mounted or framed as a series. We’d be happy to help you put the final polish on your photo essay. The completed result can become a wonderful conversation piece hanging in your living room or even in a local community center or art gallery!


